I'm in a happy mood today! This is sort of rare considering the week I have had (and it's only Wednesday)...
So far this week my car battery died on me, causing me to miss a day of work. Lewy was already at work so he had to explain to me over the phone how to use our portable charger which plugs into the wall, poor thing was so worried I was going to kill myself I thought he was gonna come home from work to fix it for me! But I now know I am capable of charging the battery in my car all by myself.... putting a new one in was a different story and that DID have to wait until Lewy came home from work.... Now $178 later I have a full tank of petrol, and a brand new battery....
I've made some progress on my two teddy bears, and the body of the first one is almost finished, with the holidays having only just finished I haven't had much time to knit, what with stuffing m face full of cheesecake eggs and chocolate bunnies, and eating waaaayyyy too much food at the Nonna's house....
I did manage to finish a teddy before the holidays started, which is now home with little Miss Daniella...
Now since I'm in a very happy mood today I feel the need to share some of my favorite things...
1. I freaking love nachos... But most of the time when I order them at the shops the put too much sauce and not enough meat, or they are too spicy so I make my own and I can literally eat through a kilo of hamburger all by myself when I make them...
2. My girls are my life at the moment.... Sade and Daisy (yes I know they are doggies but who cares!) The keep me entertained all day long, they cuddle me when I'm sad, over all they are just like little people... and I feel like a mamma bear when people say mean things about them....
3. I love my job! Being a swimming instructor isn't for everyone, it takes a lot of patience, which in all honesty I never thought I had, but it does give me a real sense of accomplishment when I see a kid who was scared to death of the water being able to swim by themselves and know that they learned it from me!
4. Harry Potter is like an obsession for me... I know it's weird but I could watch the movies every single day for eternity and never get bored... I have all the movies, all the books, and as you can tell if you have been reading all my blogs I have the Harry Potter Night in the works as soon as our kitchen is done...
5. My phone is like part of my hand... I feel extremely naked without it, and as much as I say I hate it we all know that's a huge lie....
6. Rainy weather... there is nothing more relaxing than curling up in bed with a nice cup of tea or hot chocolate while the rain pours away outside... and it makes it even better when Lewy is home to curl up next to me....
7. I love our house, even though it needs a lot of work and its small, I still love it to death, its ours and we can do whatever we want to do to it, and this makes me happy.
8. Books, I'm a very picky person when it comes to reading books, and while I do have a kindle so I can bring my books with me nothing compares to a real book that you can hold in your hands...
9. Crafting things is like my own personal therapy.... when I have had a rough day all I need to do is cut something out or stab some yarn with knitting needles and all that stress goes away, it drives Lewy insane sometimes but he has his stress relievers as well...
10. My most favorite thing of all? Lewy! He puts up with my crap all the time but still finds it in his heart to love me no matter what I do... I couldn't ask for a better partner (in crime or life lol)
Now here's 10 things most people don't know about me!
1. I got to see Tom Felton (Malfoy from Harry Potter) at Supernova in real life!
2. The movie Twister makes me think of my daddy and I always watch it when I miss him.
3. I hate eggplant.... no matter how its cooked.
4. When I'm home alone I crank up my music and sing at the top of my lungs (I'm surprised we still have windows)
5. I have an old ring of my dads that I wear out for luck (and I think it actually helps me)
6. I believe in ghosts, and aliens.
7. I'm the only person (that I know of) on m dad's side of the family with green eyes
8. I have about 40 pairs of scissors and I can never find a pair when I need them
9. I love big accessories, clunky long necklaces big oversized bangles and ear rings.... I have a collection
10. I am Team Edward (book version not movie version) because he reminds me of Lewy, being overprotective and willing to jump in front of a bus for me.... I'm not ashamed to admit it!
Now you have a great big insight into the life of me! Enjoy it lolz this might never happen again!
XxX Rah Rah
Showing posts with label Harry Potter. Show all posts
Showing posts with label Harry Potter. Show all posts
Wednesday, April 3, 2013

Sunday, November 4, 2012
Wands and Kitties!
Well things are finally starting to come along nicely with my Harry Potter gift bags.... now that I've actually finished all the bags I've made a startling discovery....
ALL THE STUFF ISN'T GOING TO FIT INSIDE THEM!
lol! But all is good because I will just make it into a couples goodie bag and put two or one of each thing in the bag (Don't worry I'll probably make those as well and they are easy as anything to do!)
 We'll start this post off with the details of the magic wands.
I went to the local cheapy shop which is just down the street from me, and since it was Halloween time they had plenty of decorations to snag for a bargain! They had some basic plastic magical wands to use for costumes so I grabbed some of them and since they all looked the same I decided to make them all individual.
First thing is that its alright if you cant find a plastic wand there are heaps of tutorials on google to make them out of plain paper,this one is a good example!
You'll need to have some paper towel or toilet paper handy and some plain white glue that will dry clear. Mix the glue with an equal amount of water and then paint the plastic wand and start sticking on the toilet paper. Once you've covered it all set it aside to dry.
Now I wanted to make mine uniform in color, not identical but similar. So I used some black tissue paper and put a few layers over the paper towel in the same way.
 And don't worry about getting it perfect the first time around because at this stage you can always cover up and places you have missed with a scrap of the paper you used on the last layer.
You can make them any way you like, to make each wand unique for myself I wrapped some bits of yarn in interesting patterns around them before I started the paper mache. After you have them looking the way you like then just add any extra details with some paint or a paint pen and cover the whole thing in a layer of glue (don't mix this layer with water though) and it will give the wand a shiny lacquered effect.
Now for the kitties!
There is a free pattern for these kitties found here! but I'll go ahead and write it down on my own blog. (just giving credit where it's due!)
 It makes three separate pieces which will need to be sewn together. I'll be using a yarn needle which you can get from any craft store where yarn is sold.
We'll go through this step by step so it's easier to understand.
The Body:
The Head:
Now pick an end of the body and sew the back of the head to it!
The Tail:
With some black yarn or thread sew on a little face and some whiskers and VIOLA!!! Your very own easy peasy knitted kitten!
ALL THE STUFF ISN'T GOING TO FIT INSIDE THEM!
lol! But all is good because I will just make it into a couples goodie bag and put two or one of each thing in the bag (Don't worry I'll probably make those as well and they are easy as anything to do!)
 We'll start this post off with the details of the magic wands.
I went to the local cheapy shop which is just down the street from me, and since it was Halloween time they had plenty of decorations to snag for a bargain! They had some basic plastic magical wands to use for costumes so I grabbed some of them and since they all looked the same I decided to make them all individual.
First thing is that its alright if you cant find a plastic wand there are heaps of tutorials on google to make them out of plain paper,this one is a good example!
You'll need to have some paper towel or toilet paper handy and some plain white glue that will dry clear. Mix the glue with an equal amount of water and then paint the plastic wand and start sticking on the toilet paper. Once you've covered it all set it aside to dry.
Now I wanted to make mine uniform in color, not identical but similar. So I used some black tissue paper and put a few layers over the paper towel in the same way.
 And don't worry about getting it perfect the first time around because at this stage you can always cover up and places you have missed with a scrap of the paper you used on the last layer.
You can make them any way you like, to make each wand unique for myself I wrapped some bits of yarn in interesting patterns around them before I started the paper mache. After you have them looking the way you like then just add any extra details with some paint or a paint pen and cover the whole thing in a layer of glue (don't mix this layer with water though) and it will give the wand a shiny lacquered effect.
Now for the kitties!
There is a free pattern for these kitties found here! but I'll go ahead and write it down on my own blog. (just giving credit where it's due!)
It makes three separate pieces which will need to be sewn together. I'll be using a yarn needle which you can get from any craft store where yarn is sold.We'll go through this step by step so it's easier to understand.
The Body:
- Cast on 24 stitches of any yarn in any color in any type on any size needles. (the finished size of the kitten will depend on what type of yarn you have used and what size needles you need, but as we are stuffing this kitten make sure the knitting is tight so the stuffing doesn't peak through!)
- Straight Knit 52 rows
- Cast off.
The Head:
- Cast on 12 stitches in the same yarn you used for the body.
- Straight Knit 14 rows
- Knit 4 more rows but knit two stitches together at the beginning of each row. (this will give the head a tapered effect.)
- Now Knit 4 more rows but increase one stitch at the beginning of each row. (we're gonna fold the head in half!)
- Straight Knit 14 rows
- Cast off.
Now pick an end of the body and sew the back of the head to it!
The Tail:
- Cast on 14 stitches in the same yarn as the body and head.
- Straight Knit 7 rows.
- Cast off.
With some black yarn or thread sew on a little face and some whiskers and VIOLA!!! Your very own easy peasy knitted kitten!
Monday, September 3, 2012
Update on Harry Potter Night!
Alright, lets just get it all out here on the table...
I've been a lazy LAZY little girl lately with my arts and craft projects... at the moment I have about 4 things laying around half finished. BUT it's all OK.
Why? I can hear you asking yourself, let me tell you why. I've noticed it! Plain and simple truth... I'm slipping back into my old habits of starting stuff and never finishing it so now I'm doing something about it!
First thing's first, the Harry Potter night goodies. I have finished the Hufflepuff set of bags and scarves, and am 80% finished with the first Ravenclaw bag (the last of the sets that I need to make) And I've found that as long as I am doing other things while crafting I get a lot more done.
So I've been watching movies, and even the Australian version of Kath & Kim, and have almost finished this bag in record time!
Now if only things will stop interrupting me... either some one comes to visit us, the dogs have been escaping our back yard because our next door neighbor is a moron who has no respect for his neighbors, or we have had to go out to see other people....
This week I have no plans to go anywhere, all I need to do is my housework and my crafts.
So with you all as my witnesses, I plan to at least have my Harry Potter sets finished and photographed by the end of this month!
I've been a lazy LAZY little girl lately with my arts and craft projects... at the moment I have about 4 things laying around half finished. BUT it's all OK.
Why? I can hear you asking yourself, let me tell you why. I've noticed it! Plain and simple truth... I'm slipping back into my old habits of starting stuff and never finishing it so now I'm doing something about it!
First thing's first, the Harry Potter night goodies. I have finished the Hufflepuff set of bags and scarves, and am 80% finished with the first Ravenclaw bag (the last of the sets that I need to make) And I've found that as long as I am doing other things while crafting I get a lot more done.
So I've been watching movies, and even the Australian version of Kath & Kim, and have almost finished this bag in record time!
Now if only things will stop interrupting me... either some one comes to visit us, the dogs have been escaping our back yard because our next door neighbor is a moron who has no respect for his neighbors, or we have had to go out to see other people....
This week I have no plans to go anywhere, all I need to do is my housework and my crafts.
So with you all as my witnesses, I plan to at least have my Harry Potter sets finished and photographed by the end of this month!
Tuesday, June 5, 2012
The Long Awaited Robes!!!
So now as promised!!!! Here is the video I used to make my Slytherin Cloak for my Harry Potter night costume. Of course in the video they made a Gryffindor robe, the only difference is that instead of using burgundy I used green material.
In the video they used king size sheets, now I don't know about where you guys come from but here in Australia sheet sets do not come that cheap (especially king size ones!), so to save myself some money I just went out to a local craft shop and got a few meters of material, I used silk because I like the way it drapes and feels when you wear it, but you can really use any sort of material you like. You don't even have to make a Hogwarts Robe out of it, you can literally make any sort of robes you like following the simple instructions on the video!
 One other little thing I did differently from the video is that I hand sewed the entire robe, I liked to be able to see my stitches and it really gives it that home made look, but you can use a sewing machine it will be a lot faster AND probably make it look a bit more professional.
The photo to the left is my finished product! You can tell from the video that I used different materials they are pretty shiny in the picture, but thats alright, this is a matter of personal tastes and you can use whatever you like!
 Just remember when you are measuring your material you want to add a few inches to each measurement, especially if you are using a sewing machine because the foot will take up some of the length. The length of the whole robe is entirely personal. I made mine just long enough to reach the floor, but if you are short like me then there isn't really much you can do about things being too long. And the arms need to come over your hands, i added about 4 extra inches to my measurements so the robe wouldn't be too short when I raised my arms, and remember that they are supposed to be big, so remember to cut them that way! I cut mine like old witches robes where the sleeves kind of fan out, but I only made it subtle.
 To the left is the clasp I used. Just a simple rope clasp that I got from Spotlight for pretty cheap. Since I was hand sewing everything I thought it would be a bit easier for me to sew each side of the clasp onto a small square of black felt. That way I could just sew around the square instead of trying to make sure I caught all of the details and this way it also gives the clasp a bit more of a larger area, making sure that it holds tight and wont rip your material as easily, this is a good thing to try and do if you have a really long robe just in case you step on it. To the right is my Slytherin House Crest Patch. This one I bought off ebay for about $4 and just ironed it onto the material, but you could always make your own if you choose, there are a few tutorials on youtube that are good, but I wanted to save some time in finishing it.
So there you have it! The long awaited House Robes Blog is finally up and going places! I hope you enjoyed it!!!
Friday, May 11, 2012
Coolio Free Font!
I finally found an awesome font for my invitations. (CLICK HERE FOR FREE FONT) You can even preview what you want to say and how it will look in the font!
I was busy trying to make out my invitations for the big night.... but none of the normal fonts really seemed to be "magical" enough, so I went searching on google for something that would peak my interest. Here I was thinking that I was going to have to hand write the whole thing a whole bunch of times, but nooooo! In a weird twist of fate I found this website, and ,while it wouldn't allow me to type my entire life story at once, it did allow me to create my invitations with a more professional look to them. No I wont be putting up pictures of the invitations until after they have gone out, because I know pretty much all of my invited guests are on facebook and that some of them will read my blog. I do want some things to be a surprise, like the invites and the menu.
But still, I'm getting all my pictures ready for my big DIY Hogwarts robe, making sure that I can find the video, and that it still fits right.
I'm going to have to watch the video again however, there are a few things that I have done to my "cloak" to make it look a little more fancier than the one on the video and I'm gonna have to tell you what I did!
I was busy trying to make out my invitations for the big night.... but none of the normal fonts really seemed to be "magical" enough, so I went searching on google for something that would peak my interest. Here I was thinking that I was going to have to hand write the whole thing a whole bunch of times, but nooooo! In a weird twist of fate I found this website, and ,while it wouldn't allow me to type my entire life story at once, it did allow me to create my invitations with a more professional look to them. No I wont be putting up pictures of the invitations until after they have gone out, because I know pretty much all of my invited guests are on facebook and that some of them will read my blog. I do want some things to be a surprise, like the invites and the menu.
But still, I'm getting all my pictures ready for my big DIY Hogwarts robe, making sure that I can find the video, and that it still fits right.
I'm going to have to watch the video again however, there are a few things that I have done to my "cloak" to make it look a little more fancier than the one on the video and I'm gonna have to tell you what I did!
Wednesday, May 9, 2012
Le Hufflepuff Bags!
So once again I present to you the Hufflepuff Bag Set (free pattern by clicking here)! I'm still working on the scarves but they will be up soon.

 This made it difficult to do the fringe at the bottom, as every time I tried to pull a bit of yellow yarn through I ended up pulling the fluff off of it and was left with a few threads, so the fringe for the hufflepuff bag is a solid color, and the fringe on the scarves will be the same. Lately I have also been looking around for some decoration ideas. I have found quite a few! There's the Hogwarts Crest that I have put on the top of my invitational letters, and used GIMP2 to turn it a nice green color to match the ink in the movies. There's the Potion Bottle Labels that I plan on using for my lollies and drink bottles, which will be easily done. I plan on getting a few of the glass water bottles from a cheapy shop and placing a label on it for drinks, and getting a few of the glass jars for the lollies.
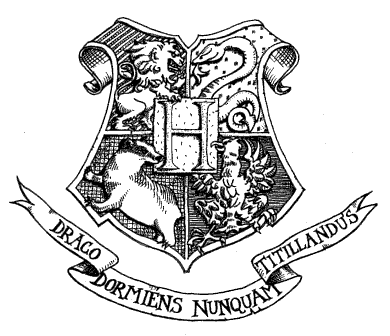 There are the Butter beer labels which you can print off for free, and I will also be putting those on some of the water bottles, but I plan on getting some glass beer mugs and placing a label on each one of those as well, as a party favor for my guests.
I do also have my slytherin cloak finished entirely now, but as I am home by myself at the moment and would need someone to model it for me.... well it will just have to wait until some one else gets home, because I highly doubt that any one wants to see it on my puppy! There will be an awesome step by step video for the next blog so stay tuned!
Monday, April 16, 2012
As promised!
BAGS!!!!!
and
Scarves!!!!!
 As I've said before here is pretty much what I've done since my big break. To the left we have our Gryffindor bags and scarves, and to the right we have our Slytherin set. I've decided to make two of each bag and a total of eight scarves, four in single blocks and four in stripes. These have taken aaaaages to make, but they have been totally worth it! My only problem is that when I went out and got all my yarn to make the bags I didnt notice that the sizes I got were all different, but that's alright it just means everything will be different sizes.
 So here we have our scarves, made from the same yarn as the bags. Four were made of each style. The pattern for these scarves is simple, I just did a search of what styles of scarves there were and made miniature versions. They measure approximately 8 inches long and have a fringe on the bottom just like a normal scarf. There is a problem with rolling up on the edges of these, but if you use a yarn that is iron-able it is easily fixed. There is a pattern for some double knitted book scarves that gave me the idea for this which can be found here and its free! That's always good to have.
Golden Snitch Key chain

 I decided to try and make a few golden snitch key chains, only because knitting them really was making my fingers bleed. It's ok though not everything needs to be knitted, there are more than a few ways to do what you like! I went to my local craft store in the jewelery section for this little number, and let me tell you it was a little hard to find what I wanted. I ended up having to go several times and to a few different craft stores to find all the parts I needed, you wouldn't think it would be so hard... Now I ended up using some end posts which were pretty long, some silver wing charms, phone charm lanyards (the black thing in the photo) and some small golden balls. I was looking for some plain golden beads, but instead I found these very ornate balls with holes on each side just the right size for the end posts to go through. Using a pair of wire curlers I threaded the end post through the wings and the ball, curled the end around making it nice and tight and then attached the charm lanyard to the curl. To top it off it will be presented in a small silver gossamer drawstring bag, with a small note reading the line from the last movie where Harry Potter receives the golden snitch in Dumbledoor's will reading.
Coming up next: Huffellpuff Bags and Scarves!
Saturday, April 14, 2012
Back In Business!!!!
So as of today I have full internet access as well as a fully functioning computer ^_^ its gonna take me a while to get back into the swing of things though I've been forced to use my phone for so freaking long I've almost forgotten how to use a proper keyboard!
Now I haven't slacked off, don't you worry! I've finished both the Slytherin and Gryffindor house bags and the sets of scarves, as well as came up with some really cute golden snitch key rings. (Pictures and instructions will follow at a later date.)
I am currently starting work on the Huffelpuff bags and scarves. The invitations are ready and awaiting a chosen date, all of the decorations are ready to be put into place, the menu is set, and now all we need to do is finish unpacking our new house, and get our kitchen sorted and we will be on a roll!
Now I haven't slacked off, don't you worry! I've finished both the Slytherin and Gryffindor house bags and the sets of scarves, as well as came up with some really cute golden snitch key rings. (Pictures and instructions will follow at a later date.)
I am currently starting work on the Huffelpuff bags and scarves. The invitations are ready and awaiting a chosen date, all of the decorations are ready to be put into place, the menu is set, and now all we need to do is finish unpacking our new house, and get our kitchen sorted and we will be on a roll!
Wednesday, August 17, 2011
The First bag...
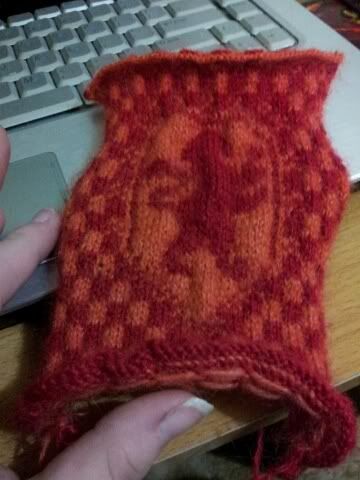
This is a quite difficult thing to do (unless you're an expert knitter), I had to start over about 4 times which is why it has taken me so long to put up a blog about it! I am VERY happy with the end result even though it took me a while and its not entirely finished, this part on its own could be used by its self, for a wall hanging or a patch on a jacket, maybe even sewn on to a pillow for a Harry Potter themed throw!
For this one I use some angora wool not sure what size it is, and size 11 knitting needles. There is more to this project though, I still have the other half of this bag to do and the other three houses as well! But now that I know what I'm doing it will be easy peasy! So hopefully this will get you all in the mood to try it out, and attempt it at least its a really fun project to do, especially on a rainy day like today was!
Next on the list: finish off the bags! Make more snitches, mice, and cats, and figure out a way to make some magic wands!
Friday, August 5, 2011
The Bag Lady...
So I have been working on some House Bags (<-- pattern found at that link) And I must say they are a lot harder than they look. Since I am only a beginner knitter I haven't really figured out how to "work in the round" just yet so I am just straight knitting them and sewing them together after I am finished.
I've started off with the Gryffindor House bag (The first pattern on the link above) and at the moment I am about 1/4 of the way finished with it, it really is a good thing this movie shindig is a few months away at least! I'm sure I would have been further along with my knitting projects had I not spent so much of my time creating the house elf pattern and trying to perfect it, however since putting the pattern up on my deviant art page it has been added to a few groups which feature various patterns and I have been informed that a few people are actually going to attempt to make one themselves! I'm sure you must all know how good that feels to know that people are attempting to recreate something you have made for them, I'm just appreciative that people have taken the time to look at it and the fact that they want to try and make it themselves is just the icing on the cake!
My friend Katie (who has admitted to me that she is a horrible sewer) has commissioned me to make her one of her very own, and I have been informed by a few people that I should create two of them and give them to her as a wedding present since she is the biggest Harry Potter Fan Girl that I know (besides myself when it comes to Tom Felton *drools*) I have considered doing this for her however, I'm not sure if I would actually be able to make two of them by the time her wedding comes around since I am still in the middle of searching for a job and having to drive back and forth to interviews all day long... Still it seems like an intriguing idea.
Any ways back to the bag! Yes the bag, I have been using size 4 needles, red and yellow Oki Angora Delux Yarn which is 70% Goat Hair and 30% PAC. and I have discovered that if you intend on using the double needle method as I have decided to do then you cannot just start the pattern from the beginning of each row as I thought, you need to work from the first to last stitch of one row and the last to first stitch of the next row in order to have the pattern turn out right, otherwise it will be very messy and all over the place, trust me I have had to restart it once already because I made this mistake!
That's all for the time being, just thought I would let you all know what I was working on at this particular moment in time, will update you all again once I have finished the first bag and I will be sure to include some photos!!!
I've started off with the Gryffindor House bag (The first pattern on the link above) and at the moment I am about 1/4 of the way finished with it, it really is a good thing this movie shindig is a few months away at least! I'm sure I would have been further along with my knitting projects had I not spent so much of my time creating the house elf pattern and trying to perfect it, however since putting the pattern up on my deviant art page it has been added to a few groups which feature various patterns and I have been informed that a few people are actually going to attempt to make one themselves! I'm sure you must all know how good that feels to know that people are attempting to recreate something you have made for them, I'm just appreciative that people have taken the time to look at it and the fact that they want to try and make it themselves is just the icing on the cake!
My friend Katie (who has admitted to me that she is a horrible sewer) has commissioned me to make her one of her very own, and I have been informed by a few people that I should create two of them and give them to her as a wedding present since she is the biggest Harry Potter Fan Girl that I know (besides myself when it comes to Tom Felton *drools*) I have considered doing this for her however, I'm not sure if I would actually be able to make two of them by the time her wedding comes around since I am still in the middle of searching for a job and having to drive back and forth to interviews all day long... Still it seems like an intriguing idea.
Any ways back to the bag! Yes the bag, I have been using size 4 needles, red and yellow Oki Angora Delux Yarn which is 70% Goat Hair and 30% PAC. and I have discovered that if you intend on using the double needle method as I have decided to do then you cannot just start the pattern from the beginning of each row as I thought, you need to work from the first to last stitch of one row and the last to first stitch of the next row in order to have the pattern turn out right, otherwise it will be very messy and all over the place, trust me I have had to restart it once already because I made this mistake!
That's all for the time being, just thought I would let you all know what I was working on at this particular moment in time, will update you all again once I have finished the first bag and I will be sure to include some photos!!!
Wednesday, August 3, 2011
The House Elf Correction (my bad!)
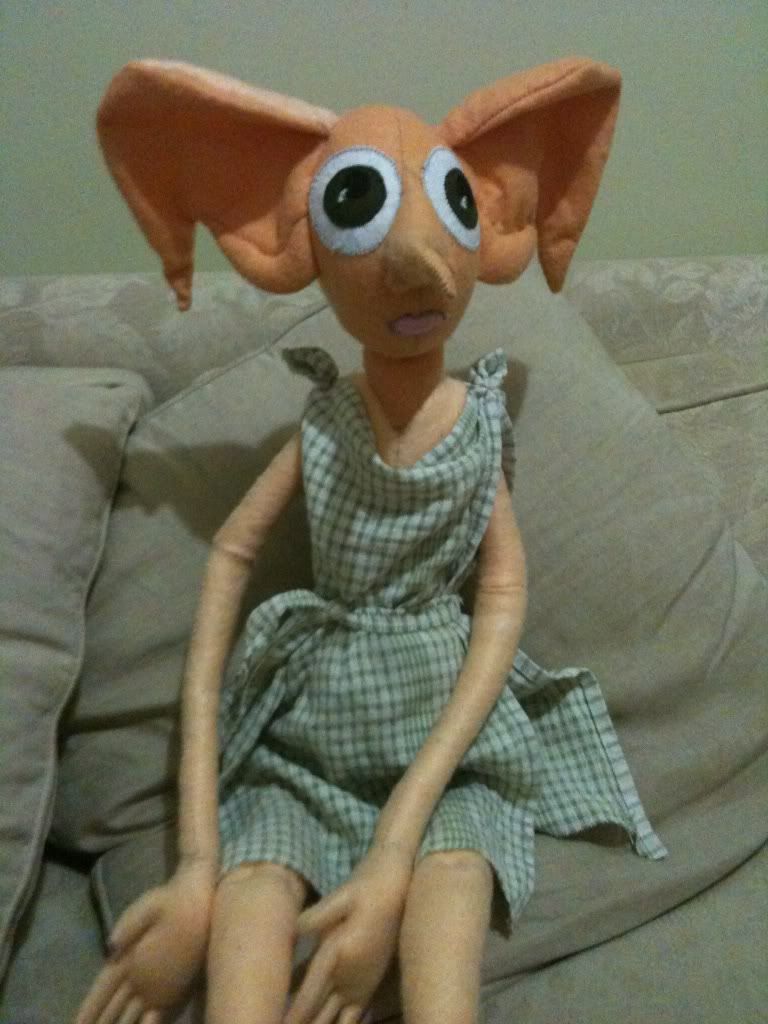
I suggest that from now on you just ignore anything I say regarding polymer clay usage unless I put up whole lessons on how I make things using it. For our own good lolz! I also had to make the mouth using felt, it doesnt look that great however, I couldnt find a tutorial on how to make a realistic mouth out of felt.
To top it off I used an old tea towel cut in half and tied at the ends for the clothes. I stitched it in place at the shoulders just to stop it from coming off, and cut another strip off the remaining bit of the tea towel to use as a belt. The good thing about this is that their clothes are supposed to look shabby so it's not that big of a deal for you to use random scraps you have laying around, whether they are a bit dirty or even if they have a hole or stain!
Hope you all have enjoyed this House elf experience! If you make one please let me know how it turns out, and remember you can make and sell as many as you like but please dont try and sell the pattern I made it free for a reason!
Monday, August 1, 2011
Finally Finished the House Elf
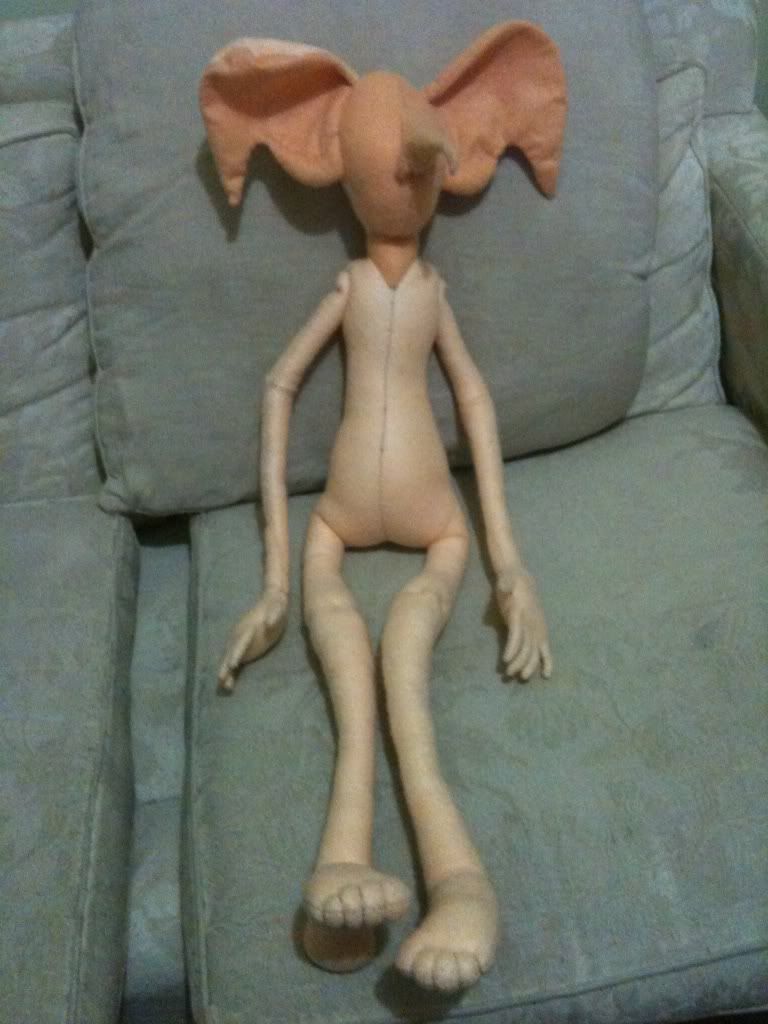 Well it's about time right? Yes I know you have all been waiting.... well at least I hope you have been. I have finally finished the pattern and sewn the doll together.
The pattern is available on my deviant art page, I had to scan it and it would not fit on a single page so it is in four parts. Part 1 Part 2 Part 3 Part 4 (sorry its a little scribbled just cut out the pieces around the black line) I hand sew the pieces together so if you do not plan on doing this I would give ample room around the pattern to allow for a machine seam.
The finished product (before the eyes and clothing have been added should look similar to the photo added!
I had to use about 8 sheets of flesh colored felt, where I traced the pattern pieces onto them to save as much space as possible. While the pattern is pretty much self explanatory I will still share a few helpful hints. When working with the hands and arms, the best course of action is to sew the hands and turn them right side out, then sew the arms and attach them to the wrists. The fingers are hard to turn, I suggest using a pin to coax them up so you don't rip your seams or your felt, or you can try using a small long object that is rounded on the end such as a crochet hook because this will also not poke holes in your material. Leave an opening at the back of the body so you are able to stuff and turn out the rest of the body, stuff it so it is as hard or as soft as you wish and then sew up the back.
After you have finished the body it's time for the little details such as the knees/toes/elbows. These are quite simple and as the pattern suggests where you should put them (the elbows and knees have been slightly enlarged to stand out (as they do on Dobby the House elf from Harry Potter), and as you can see from the image I have added where to put the toes. The arms will need to be attached separately, this is so they can move freely like a normal doll's arms would move, and this can be achieved by using flesh colored thread and a doll needle (the really long ones you can get from any craft shop)
As for the eyes, I have chosen to use polymer clay. White clay for the eyeball, brown for the iris, and black for the pupil then hot glued them to the face. Then you just take some light pink fabric paint and use it to paint on a mouth, or you can embroidery it if you are good at sewing, take some scrap material or a shabby pillow case and use it for a tunic, you can choose to make a belt if you wish!
And there you have it, a free pattern and instructions on how to make your very own house elf from harry potter! If you have any questions just leave it in the comments and I will try my best to answer it!
Still on the menu so to speak: more golden snitches and mice, as well as some house bags and magic wands!
Thursday, July 28, 2011
The House Elf Part 1
Well today I have officially finished the House Elf's head. It took a bit of tweaking but now it looks really good (wont know for sure until I have it fully stuffed though and I cant do that until after I finish his body). I'm working on his legs now, since they have to be sewn to the body.
I'm using beige thread and a regular sewing needle, poly-fill craft stuffing, and flesh colored felt sheets. I wont put a photo up of just his head though (especially since I haven't figured out what to use to make his eyes yet), I will wait until I have the finished product ready to show you.
I am however despising the fact that I have went over my internet downloads for the month and my net speed has been cut down to dial up speed... I feel like I am living in cave man times! My computer room is a total mess because while I am waiting for pages to load and killing time I am either knitting or sewing away like a tiny little machine, much to the disapproval of my fiance who is constantly trying to clean everything up only to have me come right back in and start "working" on another piece... not to say it isnt tidy, its just organized chaos I know where everything is and its all over the place!
I give it about three or four more days until I will have this little dude finished though. I have used a combination of Dobby and Kreature as references for my house elf, and since we never really saw Winky from the Goblet of Fire book I cannot be sure if a female house elf would look much different from a male. I guess this ones gender will greatly depend on what its eyes and mouth look like... Photos to come soon I hope! And once again remember once I have it up the pattern will be free to any one else who feels like they want to take on the task of creating their own little house elf!
I'm using beige thread and a regular sewing needle, poly-fill craft stuffing, and flesh colored felt sheets. I wont put a photo up of just his head though (especially since I haven't figured out what to use to make his eyes yet), I will wait until I have the finished product ready to show you.
I am however despising the fact that I have went over my internet downloads for the month and my net speed has been cut down to dial up speed... I feel like I am living in cave man times! My computer room is a total mess because while I am waiting for pages to load and killing time I am either knitting or sewing away like a tiny little machine, much to the disapproval of my fiance who is constantly trying to clean everything up only to have me come right back in and start "working" on another piece... not to say it isnt tidy, its just organized chaos I know where everything is and its all over the place!
I give it about three or four more days until I will have this little dude finished though. I have used a combination of Dobby and Kreature as references for my house elf, and since we never really saw Winky from the Goblet of Fire book I cannot be sure if a female house elf would look much different from a male. I guess this ones gender will greatly depend on what its eyes and mouth look like... Photos to come soon I hope! And once again remember once I have it up the pattern will be free to any one else who feels like they want to take on the task of creating their own little house elf!
Wednesday, July 27, 2011
The Golden Snitch
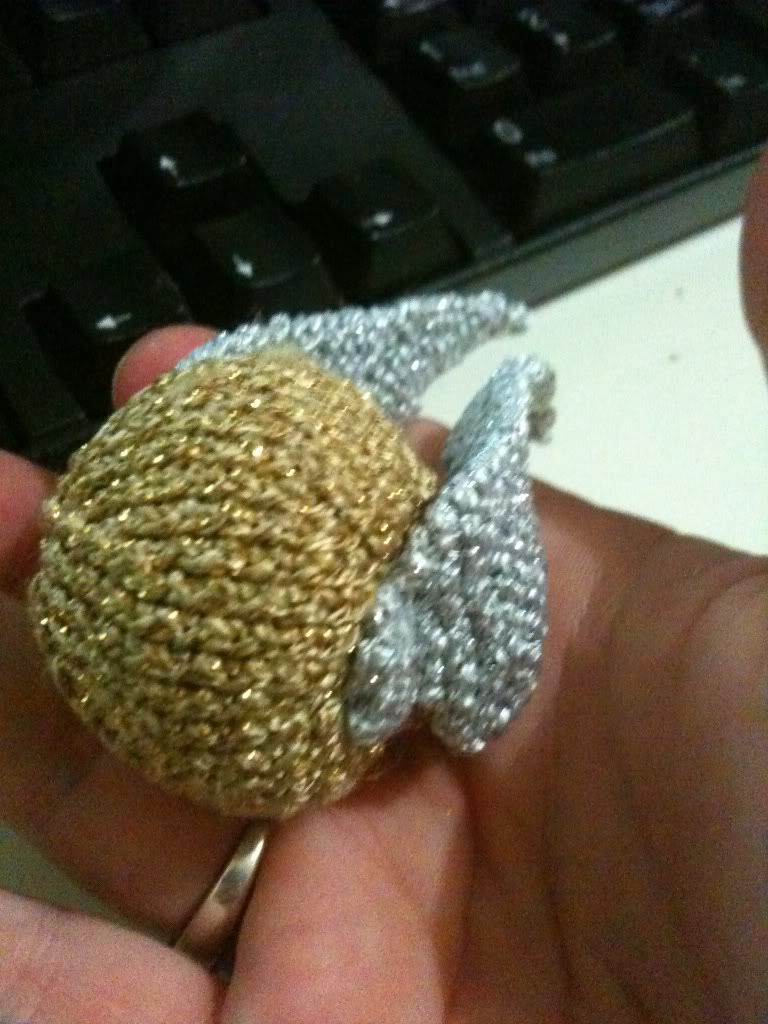
One more pattern that has been approved for my Harry Potter goodie bags (the one I'm making for each guest attending my movie marathon once the last DVD comes out!) I'm still trying to perfect my House Elf pattern working on getting the face to look right, and I havent figured out what to use for the eyes just yet.... Its proving to be a bit difficult, from looking at the photos on google images I'm looking at making HUGE eyes on a smallish face, I'm a little bit worried that using polymer clay is not going to make the cut for making eyes, and I cant figure out where to get dolls eyes at any shop. Will have to make several attempts at creating them I'm sure... but we will get there eventually =) Any tips would be much appreciated!
As I said I'm still working on the pattern and creation of the House Elf, the pattern will still be free to you all once I get it right.
And I'm still looking for a nice cat, owl, and magical wand pattern to put in my goodie bags. I will keep you all updated on the progress!
Monday, July 25, 2011
The Little Mice....
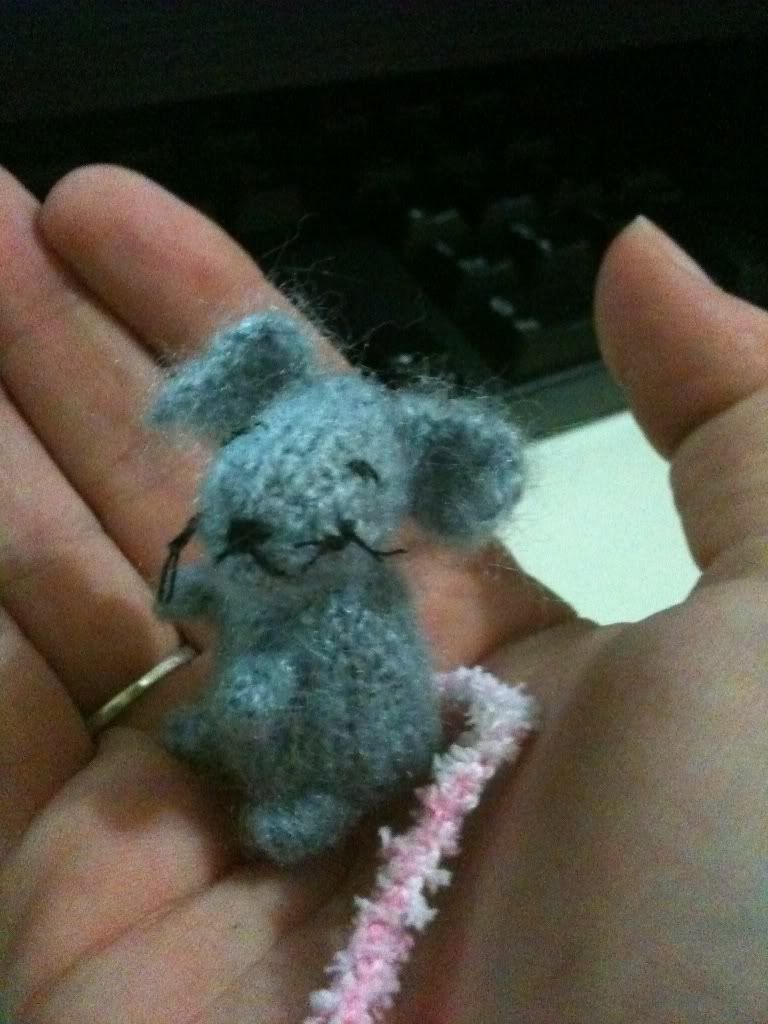
I hope you all enjoyed this little tidbit and the photo! Next Creation? An (almost) Full Size House Elf for a novelty decoration! Pattern created entirely by me while looking at google images from different angels. This pattern will be free to any one who wants it (although it may be on a few different links as there are quite a few pieces I'm having to make!)
Subscribe to:
Posts (Atom)